Saturday, July 12, 2014

Air Cleaner

I picked up a fairly neat Air Cleaner the other day over at Studebaker John's--a mid-50's Packard air cleaner (I believe) that can be easily switched from an oil bath to a paper filter. Pretty cool.

sorry for the unsteady phone pic!


This said, it has a few problems--there are a couple of small dents and dings and since it had been sitting for a while it had managed to get a manageable size mouse nest inside of it. Unfortunately, since it was sealed there was no way to get into it to remove the nest or get to the backside of the dings to pound them out. So off comes the bottom.

I used a cutting wheel on a dremel--this would allow me to weld the bottom piece back in place later.


And somehow, those nests are always bigger than you expect them to be:


Now that I look at it (and the tubing that was inside this part) there really is a lot of restriction in this air cleaner. Might be better if I open/clean things up a bit:


no going back now
Since I did that, I needed a way to bolt the filter on. I could weld a piece of metal and drill a hole and tap it to thread in a bit of all-thread. But then there'd be this big piece of metal right in the way of the flow. Hmm...I wonder.

A little twist here and there...
And a couple of welds should make that a little better
And it is back together, ready to go be rechromed.

But first, I think I'll see if I can find a filter that will fit slightly better...


Sunday, July 6, 2014

Quick update

On Friday, I dropped my seats and center consoles (I have both a front and rear console) at the upholstery shop. I found an experienced and recommended person who has done numerous Studebakers; unfortunately, he lives 2 hours away. But it is worth it to me for that experience--it should save time down the road, and if I want to drive it on International Drive Your Studebaker Day this year, saving time is very important.

And, back home, I kept cleaning, sanding and painting small parts. My pile is growing:


Saturday, June 21, 2014

Orphan Car Show - Oregon City

Saw quite a few Studebakers today at the Orphan Car Show in Oregon City--some of my favorites:

Love the flamingos (Phoenicopterus plasticus) next to this pair of nice Larks!

That cream yellow Cord has nothing on the 38 Commander next to it.

I passed by this 50 Commander on the drive up here

A nice 50 Starlight Coupe -- the predecessor to my car

Nice 53 Starliner

And a pair of 63s, a Superchaged Avanti with a 4-speed and a very well restored GT Hawk

Sunday, June 15, 2014

heater blower assembly

The heater blower assembly mounts under the passenger fender, taking fresh air in from the fender vent on that side and then pushing the air back to the under seat heater core by means of a long tube, similar in size to the dryer vent in your home. Since my car didn't come with a heater, most of this assembly was missing and I'd purchased more than enough bits earlier on to piece together what I needed.

So going through my box of heater parts, I picked through what looked like the best of the lot, and started disassembling and cleaning things up. My first problem came when I discovered that the blower fan was stuck on the motor shaft. I couldn't even get it to release with a gear puller. So out came the dremel with the cutting wheel.


That done, I could remove the motor and replace it with a new one (Napa part #655-1020 is a direct fit.) A quick browse through my parts bin found another fan to replace the one I cut off.

Even though the parts aren't visible, I finished my clean up, removed the little bit of surface rust with a wire brush and wheel, and then painted them up--should be good to go for another 60 years.


Friday, June 13, 2014

And then more sanding


Stopped in on the way home from work to get some measurements for a temporary seat and saw that the car was back together and getting worked on. Good to see.

Sunday, June 8, 2014

The little bits...

Just because my car is off to the body shop doesn't mean there's not a lot to be done. There are still hundreds of little pieces that bolt onto it, and all those things need to be cleaned up, reconditioned where needed, and if they'll take it, spruced up with a little paint.

I decided a good place to start (largely because I keep tripping over them) were the horns.

The Stude has two of them, a high and a low pitched one (marked with the letters H and L) and while they work, the power wire coming out of the horns is a bit brittle. I figured how hard can it be to replace it? Plus they were just a filthy mess--years of travel under the front end of the car had left their toll; that, combined with quite a bit of overspray from previous paintjobs and they definitely needed attention.

So up on the bench. The cover, a sheet metal dome, is held in place by some bent-in tabs around the edge--by carefully prying those up with a screwdriver, I found out what the inside of an old horn looked like.


My inspection found the internal wiring to still be in very good shape--still supple and well connected. So I decided to just replace the power wire.

The power wire is held in place by a combination of a bent over tab and some solder. It took quite a bit of heat to finally be able to pry that tab open--called for a bit of patience.


After it was finally free, I pounded out the dents in the domed cover, brushed off the dirt and surface rust, sanded it down, primed and painted. Then on to the next.


Not perfect, but good enough for something you have to crawl under the car to view. On to the next bit.

Friday, May 30, 2014

Back to the Body Shop

The body shop called...they want my Stude back.


So I told 'em to come pick it up. 

Sunday, May 18, 2014

On to number three

Now that I've gotten the power steering leaks under control (ok, mostly--I have a very small leak around one of the hose connections on the power control valve; I've tightened it up a bit, so we'll see if that fixes it...) it was time to move on to the leaks in the brake system.

From my research on the subject, I have a couple of things against me: I'm using synthetic (Dot 5) fluid and stainless steel lines. Stainless steel is exceptionally hard, which makes it difficult to get it to crush sufficiently in order to establish a seal, and Dot 5 fluid is a bit thinner than traditional fluid. Plus I really didn't have any indication that the residual check valves and proportioning valve provided with the dual master cylinder/disc brake kit were rated for Dot 5 fluid; I figured I'd just start over.

So I ordered a very nice set of residual check valves and a fancy proportioning valve made by Wilwood, ran down to the parts store and purchased a collection of various lengths of coated brake line, and went to work.

First, I found a suitable location to mount the proportioning valve, drilled a couple of holes in the floor, and used carriage bolts to avoid leaving a big bump under the carpet.


After that, it was simply a matter of bending and tweaking a bunch of brake line.


Now all that remains is to bleed the system and see if I have any more leaks. Fingers crossed.

Sunday, May 4, 2014

Not so fast...

"Ok, something isn't quite right," I thought, looking down at the half quart or so of power steering fluid on the floor of my garage. The second power steering pump was now leaking out the shaft seal. What was happening?

After a little research, I realized that the rubber seal that goes under the wing nut holding the lid on the reservoir was blocking a small hole put there to relieve pressure. Hoping that's the case, I pulled the pump off, verified that it was leaking from the front seal, and went out and bought a new seal and a couple of o-rings for under the reservoir. And I cut a little bit out of that seal to let the lid vent.

The most time today was spent cleaning up the reservoir and pulley for paint--I figured while I had it out I'd paint it black.


I'm not going to say it is fixed yet--we'll have to see. Fingers crossed though.

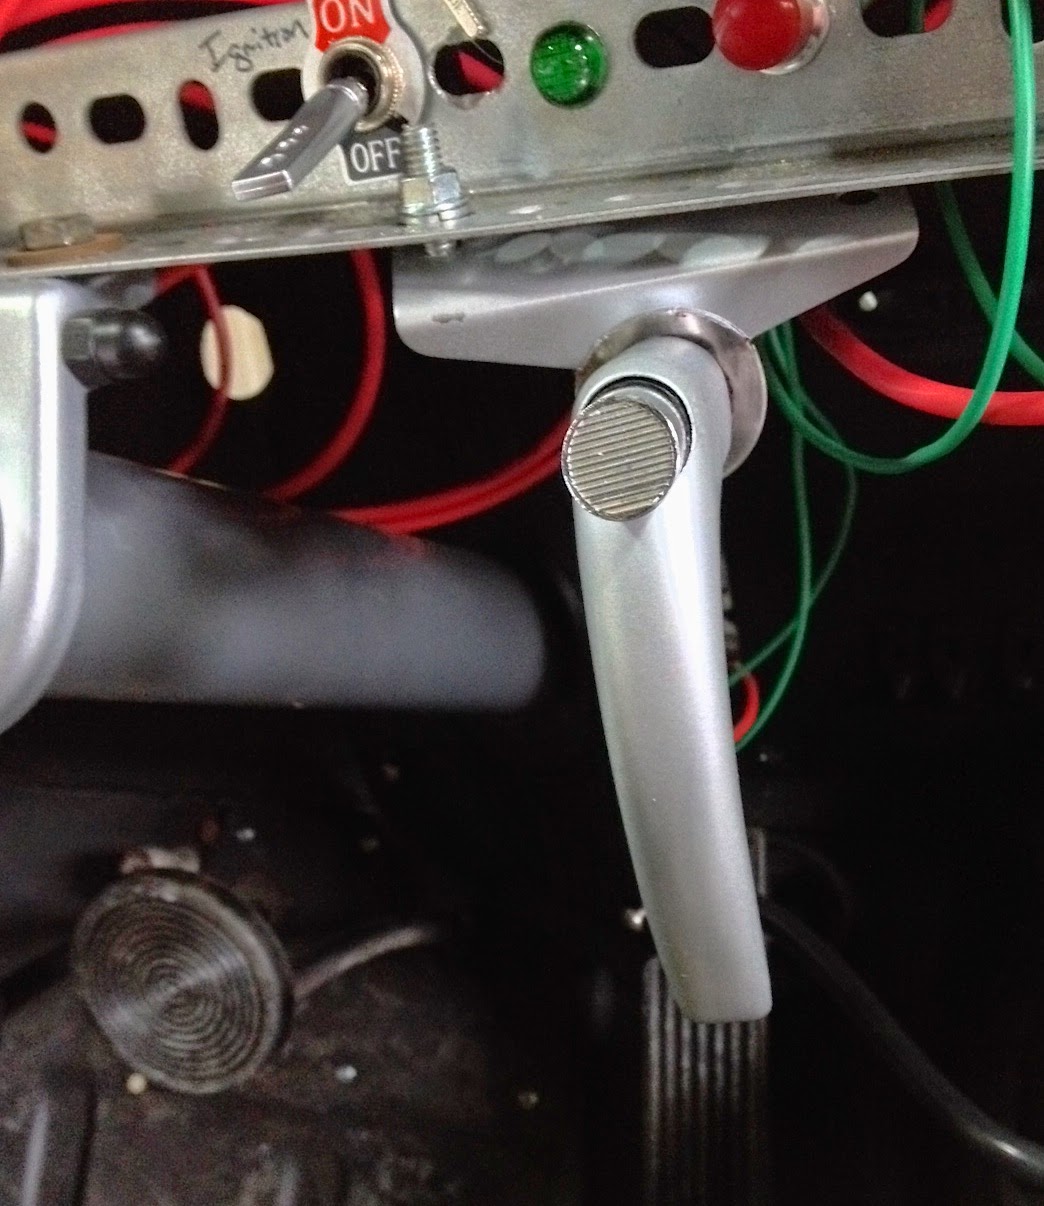
I also replaced my beat up old parking brake handle with a new old stock one. The grip portion of the handle requires paint, so I sprayed it silver to match the column and dash, and installed it. It is nice to have a parking brake again.


Careful observers will notice that I nicked the paint on the mounting bracket--an easy fix, but I'll wait until I install the dash to take care of that (and any other nicks along the way.)