Sunday, May 27, 2012

Right front fender patching

Let's see, where were we?

Oh yeah, I had chickened out, uh, I mean, wisely decided to buy preformed patch panels for the repairs to the driver's side front fender. But the passenger side was in better condition, so I decided to make the panels for it myself.

If you'll recall, here's what the bottom-front of the fender looked like after I removed the paint to inspect it:


The first step was to get rid of that epoxy, and cut out the thin material. After I did that, I repaired the small amount of rust through on the brace behind the area, cleaned and treated it for any rust that might be remaining, then primed and painted it so it wouldn't rust again.

From here on out, pictures of the fender will be upside down

Next, I cut out a piece of left over flooring material a little bit larger than the hole in the fender and bent and hammered it into a curve that matched the fender.


Then it was simply a matter of grinding the patch and the hole in the fender until they fit together nicely.

Finally, I welded it in place following the "series of spot welds" technique to avoid warping the metal and ground back the welds. I still have a little bit of grinding/filling to do, but the bulk of the hard work is done.


Saturday, May 19, 2012

An ounce of prevention...

I'm back from a week in Indianapolis (no, I didn't get to go to the Speedway, but I did get to see some Indy cars taking practice laps from the air) and so have wandered out to the garage to get to work.

Today's work is a bit more introspection and a bit less cutting and grinding. Take a look at this:
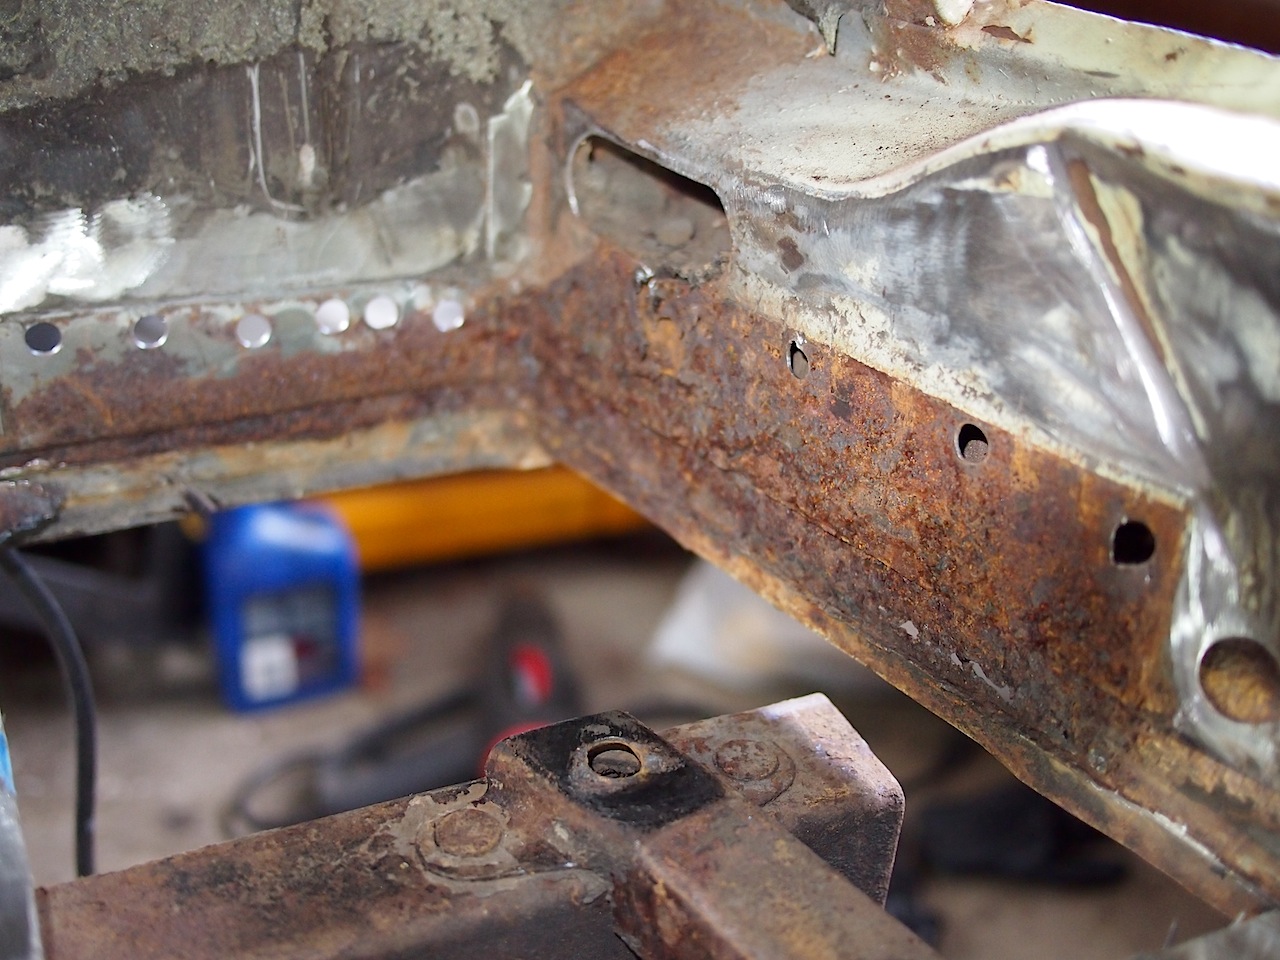
It is hard to see but if you look carefully you'll notice that the surface around that rusted out area is pushing up the sheet metal from behind; this is because dirt and debris got trapped between the outer fender skin and the brace behind that area. After a few years of trapped moisture and junk, the fender rotted out from behind.

Now I could cut this to clean metal, form a patch, weld it in place and call it good. It'd probably last for many years. Probably.

When you're spending a few thousand dollars on a quality paint job I don't like the word "probably." And so I'm going to cut out an even greater area so I can thoroughly clean all signs of rust from the front of the brace, treat it so it won't rust again and then weld a new patch over it.

But I'm not going to form this one myself. As Dirty Harry was fond of saying, "A man's got to know his limitations." And this one--especially the top portion--is a complex curve that is going to be incredibly visible. So I've ordered a rust repair patch for the driver's side and will cut out the areas I need from that preformed section and weld it in place.

I've also ordered a repair panel for the rear weatherstrip channel for the trunk area--there had been some dodgy repair there during the last repaint--and a small fender bender at some point that had bent the metal along a formed line that was simply filled with body putty during the last paint job to make it look ok. Easy enough to fix now--and that patch was very inexpensive.

So at this point, I have a bit of waiting before I can push ahead with the left front fender. But there's plenty of work remaining elsewhere.


Saturday, May 12, 2012

A Stude-gathering

Willamette Chapter of the Studebaker Drivers Club meet in Independence, OR for their annual photo shoot.

Sunday, April 29, 2012

Of Swap Meets and Pleasant Surprises

An important part of the old car hobby is the event known as "the swap meet." Like a rummage sale liberally doused in testosterone, local hobbyists pull boxes of parts that "weren't quite good enough to use in their project but too good to just throw away" out of the corners of their garages and haul them, complete with cobwebs and the shells of dead insects, in the requisite trailer formed from the back of a pickup on an annual pilgrimage to the county fairgrounds. There, their butts firmly planted in nylon camp chairs and their feet propped up on old coolers, they ply their wares, insulted by those who have no desire to pay top dollar for every item on the makeshift table.

Oh, don't get me wrong--it isn't that I don't like a good swap meet. In fact, it is often the place where you find that little part that you're missing from that old car you're spending hours putting back together. And that, then, is my problem: I know that if I don't look at every table, if I don't rummage in every box, that I'll miss "the deal" and that rectangular dash clock and trim that I'd love to have next to my beautiful AM radio that I haven't been able to get online was in that old shoe box next to the jumper cables that, missing one of the four attaching clamps, was deeply discounted at $10.

After a few minutes, I'm starting to have serious sensory overload. It doesn't help that I've never liked crowds, and there are those in a similar state of concentration--I know that clock is here somewere--that make navigating around difficult at times. And then there are the distractions. No, not the funnel cakes vendors--I'm talking about big ticket items. Like the 40 Lincoln Zephyr with that really cool flathead V-12. Or the "wow, that is a really nice 70 Chevy Pickup for only $3,000."

Focus, I've got to focus!

Fortunately, it was a small swap meet (which is good, because I'm not sure I'd survive a big one.) In fact, I overheard some of the old timers comment that it was a lot smaller than normal. After only an hour and a half, I managed to make two complete laps of the event and only uncovered three Studebaker items--a couple of Edmonds dual-carb intakes (one for the Champion 6, another for the Commander) and a set of hubcaps. I didn't need the hubcaps and the price for the intake was double what they've been going for on ebay. So, slowly, still hoping to find something--anything--that I could use, I make my way for the gate almost empty handed.

No, I did not find that clock. I did find the perfect gift for my wife, though. It was really odd, not terribly well done and at 50 cents,  perfectly priced:


That wasn't the pleasant surprise though. After my failed excursion (I'm sorry, but getting up early, braving a crowd and obsessively looking through the shriveled remains of bugs for an hour an a half doesn't exactly match my definition of "successful," hand-carved squirrel withstanding) I stopped by the storage  facility and threw the front fenders in the back of the truck. I knew there was some rust and it was time to discover just how much.


The passenger side looked fairly rust free, although there was some suspicious looking areas in the paint which showed signs of thicker than acceptable body filler usage. The driver's side fender had definite signs of rust, with some paint bubbling down low, some cracking and a rust through spot near the top. I've marked those areas in red in the photo above.

Like many cars from the 50s and 60s, Studebaker coupes are notorious rusters. By far the worst place is the trailing edge of the front fenders, where moisture and debris gets trapped between the outer shell and an inner brace. My fear? The whole rear edge of both fenders would need replaced--while repair panels are available it is a tedious job.

I started with the passenger fender. I start grinding and I hit body putty. A great deal of body putty (over a quarter-inch.) I'm starting to get really concerned. But soon shiny metal starts to appear.  Lo and behold, a small area at the bottom--about 6 inches in length and an inch or so wide is all the rusted through area I can find. It is filled with an epoxy of some sort.


That'll be an easy repair--I'll just cut that out and shape a piece of sheet metal and weld it in place. But what about the driver's side? I know it is going to be much worse! But how bad?

For once, the rust was only as bad as it appeared. This is a first for me--typically rust hides under paint and is spread much further than expected. Apparently, the dry San Diego air--and perhaps that big blob of epoxy (also used on the driver's side) helped stop, or at least slow, the spread of an old car's worst enemy.

I expected the entire area around the vent to be full of rust!
The bottom 6 inches or so of the driver's side fender
The rust-through that was visible at the top of the fender. I expected this to extend all the way down to the bottom!
Again, no need for an extensive patch--I'll be able to form those with scrap pieces I already have. This should be a fairly easy fix.

And that is a very pleasant surprise.

Sunday, April 22, 2012

Gutless

Okay, I admit. The little flat head six in the Stude was pretty under powered, but in this case I mean really gutless:

Not much of a car left

The surprising thing was just how little time it took. Now I realize that having the fenders removed aided access--but only to the motor mounts. Of course not having the radiator surround and grill in place saved me from having to lift the motor higher than I would normally, and I did pull the transmission along with the engine.  The majority of my time was spent figuring out how to remove the clutch linkage (it was actually easier than I was making it.) But a little under an hour later I'm sitting in my chair, drinking a cool beverage and posting this.

Not sure what my plans are for the old engine.


I'd like to keep it, eventually rebuilding it to my original plan (dual carbs, split exhaust, finned head) but we'll see. It would be a waste to just have it sit in the corner of the garage looking pretty if it could go to help keep another Studebaker on the road.

Saturday, April 21, 2012

Quick little rust repair

There was one last rust through area on the main body shell to repair, just in front of the left rear tire. You know the drill by now:
I noticed a area where the undercoating was loose and found rust under it.
I cleaned the area back to metal and cut out the rusted pieces then treated it just to be sure.

First patch welded in and ground flush


Patched and ready for finishing.
I'll soon be starting on the metal work on the front fenders. But first a bit more work on the body shell tomorrow.


Sunday, April 15, 2012

Studebakerin' in the Key of G

Heading into this weekend, I wondered if I'd be able to get any Studebaker time in at all. Friday morning started out with a crack and a bang, literally, as the diverter valve in my shower exploded in a more spectacular fashion than I expected; a bit of the valve itself flying out an leaving a bruise on my shoulder where it first struck before clattering to the floor.

But luck indeed changed and between the rebuilding of the shower and the typical weekend chores of early spring, I did find time to work on the Studebaker. The weather was wonderful, so I pushed it out of the garage and set forth with my random-orbital sander loaded with 60-grit paper to bring the floor of the trunk and cabin down to bare metal.

That took longer than you'd think. There were plenty of little corners and even though I'd previously removed the vast majority of the asphalt coating off there was still enough remaining to quickly clog up the sandpaper. But after about 4 to 5 hours of sanding I got it done. Once finished, I cleaned up the area and brushed on a layer of a bare metal primer that contains a rust converter. 

Stage 1 complete
One thing I noticed when working in the car that it resonated at a particular pitch--and would continue to ring on for several seconds after the sander was shut down. Musicians (and physicists) will recognize this effect as the natural resonant frequency. In its current state it hums at a G.

I wonder if this is how they came up with the identifier for the Champion Coupe on the body tag? (G). I know that doesn't explain how they came up with the name for the V-8 version (the Commander, which is designated by an H) but I like it anyway so what do you say? Let's start a new internet rumor about it right here!

Sunday, April 8, 2012

Trunk Corner Repair, Part 2

I continued cleaning up the corner to ready it for the patch. After cutting out the area that had rusted through, I had discovered that a bunch of tar had been stuffed in an access hole in the trunk--that needed to come out of there before I could clean up the surface rust around it. After who knows how many years, the mass was solid, so out comes the heat gun and putty knife.


And soon it is out of there:

Large, tar-like substance defeated!
Next, I needed to make a patch for the area I cut out. After forming a pattern out of cardboard, I cut a piece of sheet metal to size and welded it into place.

Still needs a bit more finishing--but there's more welding to be done.
Next, there was a bit more clean up on the inside. I had to get rid of all the remains of the trunk corner, so there were a few more spot welds to drill.

Still a bit more clean up to do, but getting close.


I'm finally ready to cut down the corner patch and fit it. Now I must say that this corner patch, while solidly built, was not the best match to the corner--so a lot of adjustment was necessary. But after lots of trimming and pounding and bending, I got it tacked into place.


And then it was simply a matter of closing the gaps. And while I had spot welded the side (at the top of the above pic) I still needed to spot weld the corner to the back of the car. And here's where I left off--still a few little holes to fill and a bit more grinding and hammering it flat:


I still have a solid day or so of work--most of it underneath grinding down the underside of the welds, but overall it looks like I'm done with all the major patching. It is a good day.

Saturday, March 31, 2012

Trunk Corner Repair, Part 1

You'll recall I mentioned that I was going to go ahead an replace the right rear corner of my trunk since I found a few rust holes there. I started on that project today.


Even though there were a few small rust holes, that rust around the edge of that corner brace bothered me. Plus I knew that this was one of the areas where Studebaker coupes were rust prone. So after cleaning up the top, I moved to the bottom and striped off the undercoating.

A little worse than just a few small holes!
That's no good.

I'm glad I decided to fix it after all. It is, by far the worst rust I'd found on this car. So on to removing all that rusty crud.

Blue marks the spot! (Plenty of solid fringe around the edge of that rust)
Then, after drilling out the spot welds, a few minutes with a cut off wheel.

I feel better already.
There's still a bit of cleanup to do in the areas under the corner brace.


The side (on the left near the middle) appears to be just a good coating of surface rust so just needs cleaned up, but the back (the area running diagonally from the middle of the picture to the right bottom) has some rust through areas. I'll cut those areas out and weld in new metal.

That's enough for the day--off to walk the dogs before the rain starts again.

Friday, March 30, 2012

"Those Studebakers sure were ahead of their time," he said.

I was having a conversation with a co-worker while waiting for a cup of coffee on break, and he asked about my car. During this conversation, he mentioned that Studebakers were ahead of their time. Of course, he was referring to their styling--which is true and which had a huge impact on cars of the following decade.

But Studebaker wasn't just ahead of their time as rolling artforms. Here's a list of just a few of their engineering and safety firsts:

  • In 1919 they were the first to use pressed steel throughout their construction.
  • In 1921 they were the first to develop (and patent) molybdenum steel and to produce a car using it.
  • In 1927 they were the first to use a mechanical fuel pump.
  • In 1930 they were the first to use free-wheeling (this was a huge step forward in driveability.) That year also saw them introduce automatic vacuum spark advance control (improved fuel economy.)
  • In 1935 they were the first to use planar wheel suspension
  • In 1936 they were the first to use an automatic hill holder.
  • In 1937 they were the first to use a variable ratio steering gear and direct acting shock absorber. They also started using double wall pickup bodies on trucks (another first.)
  • In 1946 they were the first to introduce postwar styling. They also threw in self-adjusting brakes (another first.)
  • In 1953 they were the first to use a high efficiency paper air filter.
  • In 1954 they were the first to use self-centering, self-energizing brakes.
  • In 1955 they developed interlocking safety door latches (which means I need to check my door latches!)
  • In 1956 they were the first passenger car to use acoustical sound deadening-headlining.
  • In 1961 they were the first to have instrument panel safety padding standard on all passenger car models.
  • In 1962 they were the first U.S. auto manufacturer to offer caliper type disc brakes on a full sized car, the first to install seat belt mountings for four belts in every car, first to introduce a built in roll bar, adn the first to make transistorized ignition standard equipment.
  • In 1963 they were the first to install seat belts in the front seat of every car in its line. They were also the first to introduce a sliding roof station wagon.