Friday, November 11, 2022

Internally Controlled Antenna

 I love weird, gimmicky engineering.

In 1953, one of the myriad of options for my Studebaker was an internally controlled antenna. This nifty little thing allowed the driver to reach under the dash, and crank a little knob on the kick panel to raise and lower the radio antenna. When one came up for sale recently, I had to have it—I mean what person would have bought the AC-2300 Stratoline Automatic Tuning 8-Tube Radio for $81.25 without springing an extra $10.25 for the AC-2303 Internally Controlled Antenna? (That’s a total of $1,028.28 in today’s prices, if you were curious. That better be a nice sounding AM radio for a thousand bucks!)

But of course that means drilling a hole through a freshly-painted fender.

Wouldn’t it be better to just get an internal antenna and hide it under the headliner?

Fortunately, as I’ve mentioned numerous times here, Studebaker enthusiasts have a wonderful support network. A quick call to the Studebaker National Museum ended up with a photocopy of the installation instructions, complete with a template for drilling the hole, in my mailbox a few days later. I guess there’s no putting this off then.


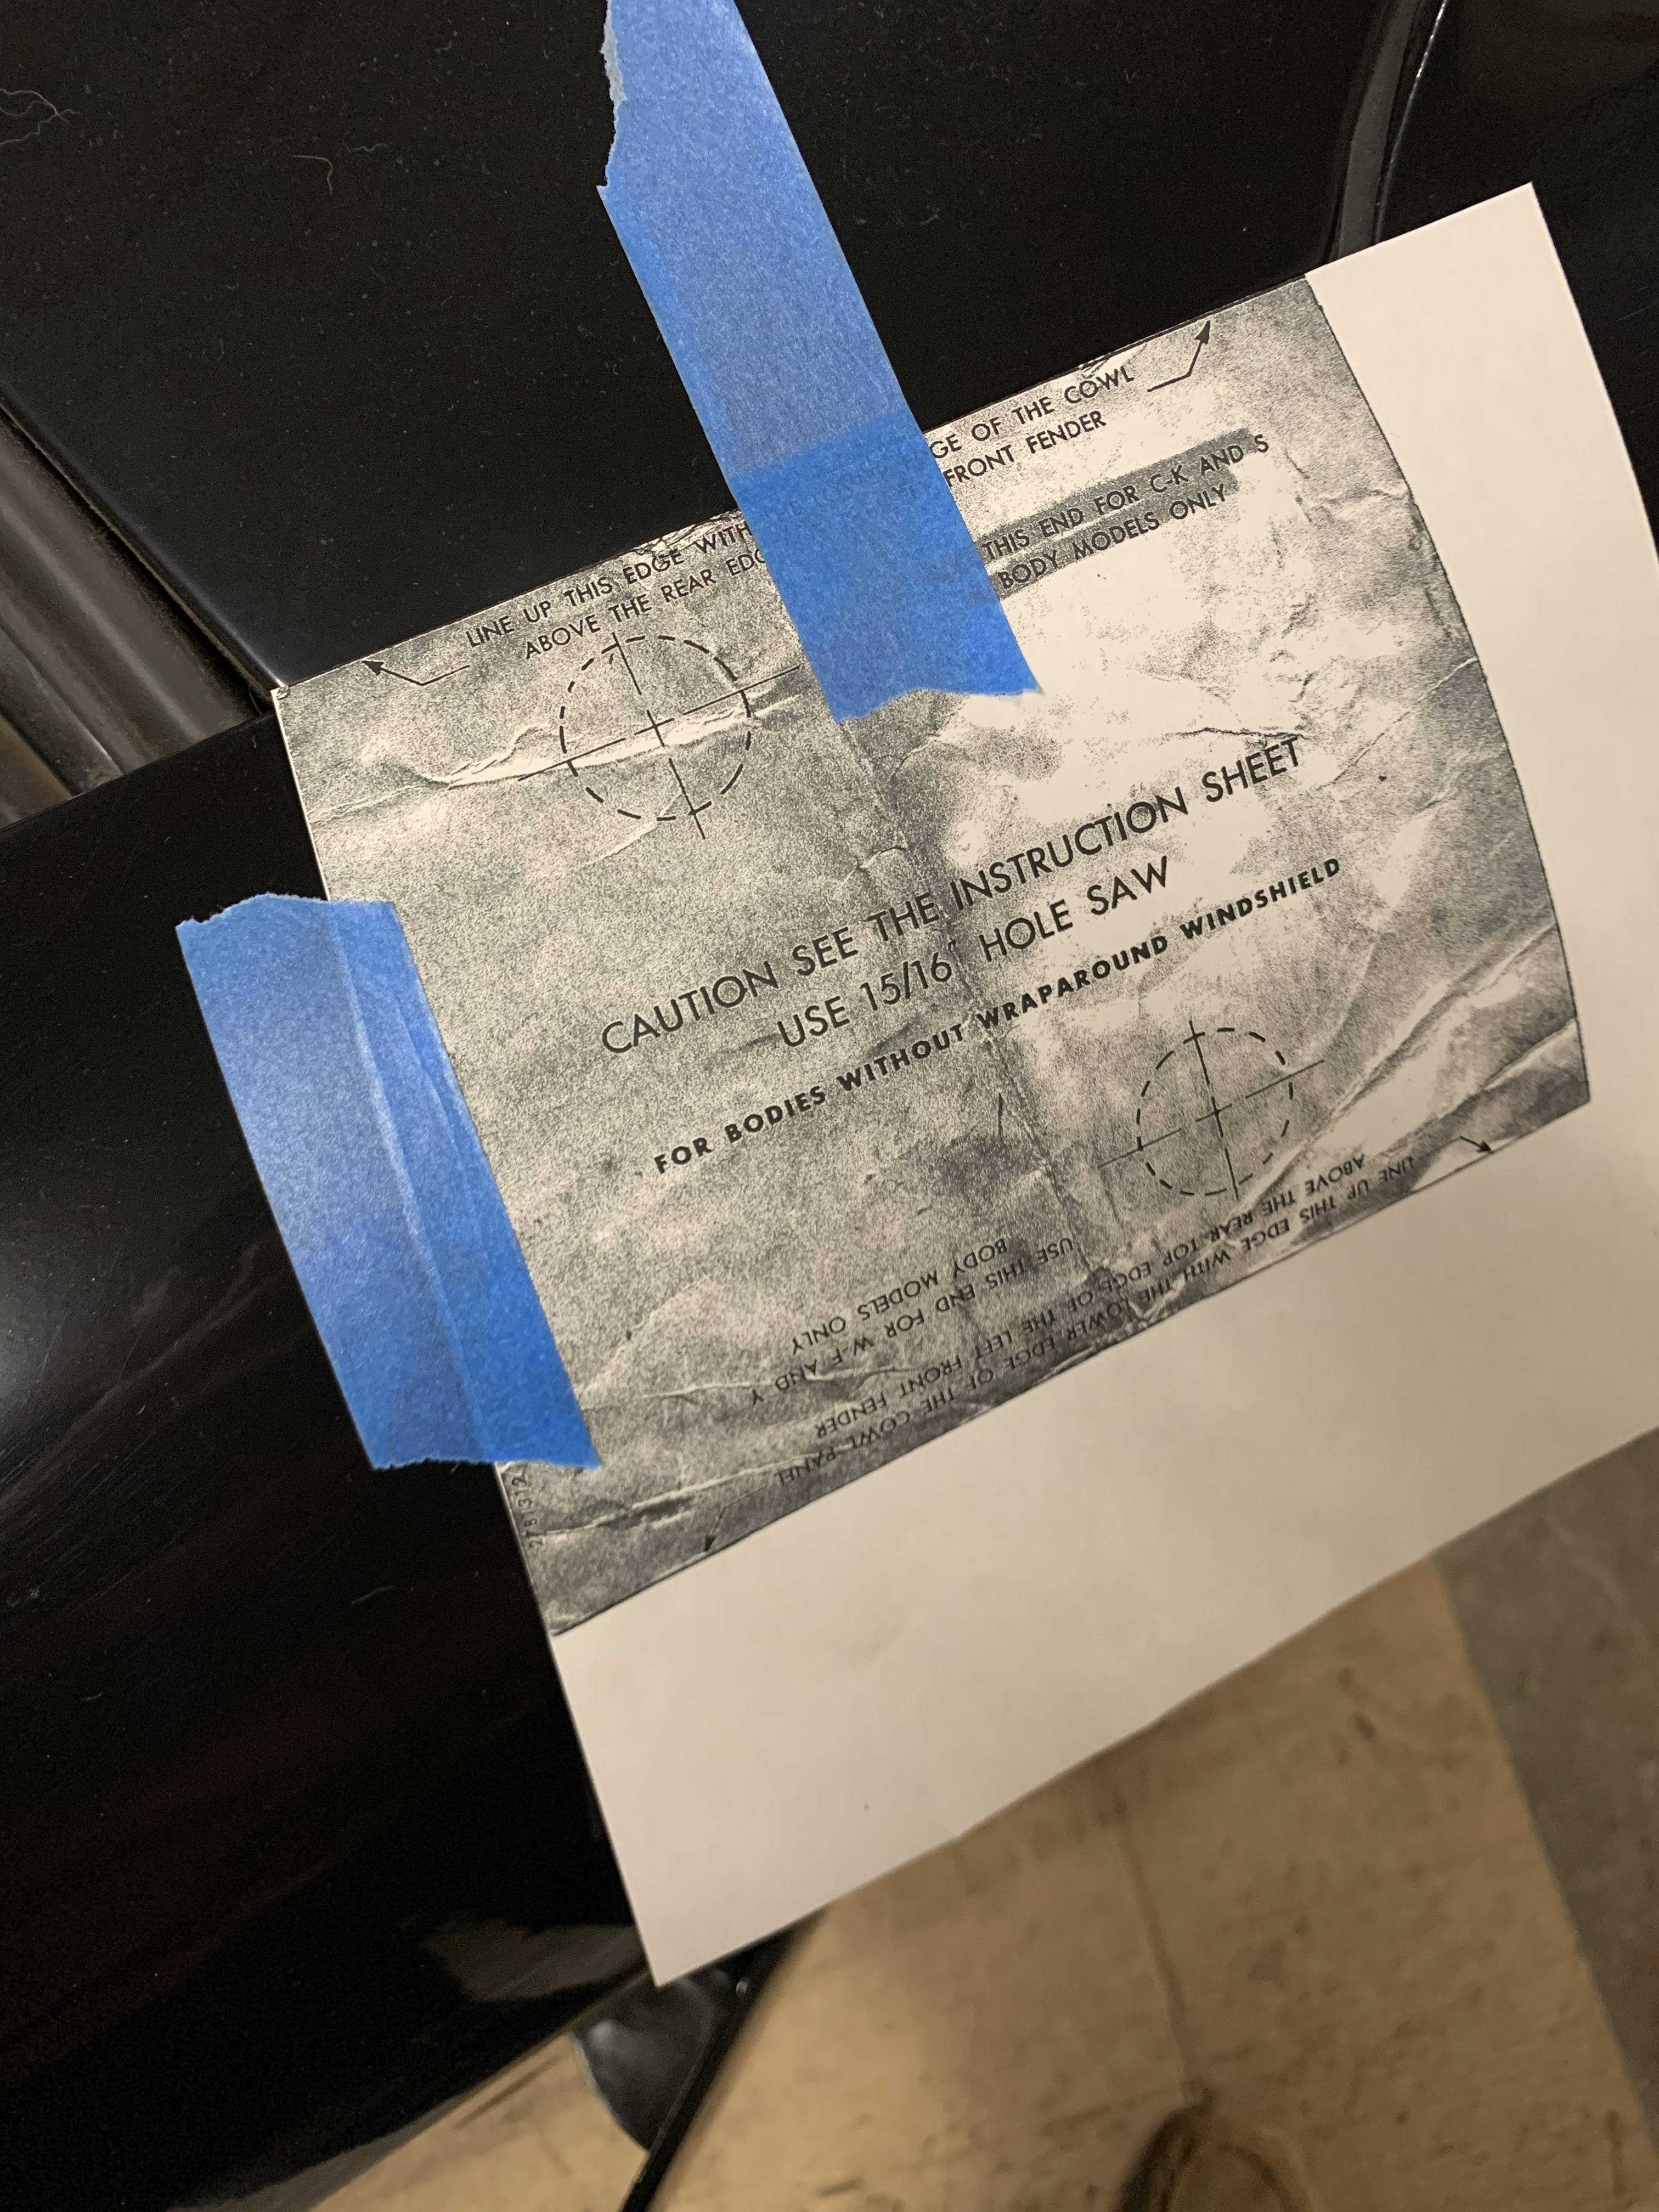
A quick tap on a center punch and I was set to drill. The instructions called for a 15/16” hole saw, but the best I could come up with was a 7/8”. It worked just fine.


Only a tiny tear in the paint—not bad. The gasket will cover that.

Next up, the install. It goes in from the inside.

Had to drill a couple of small holes for the mounting screws.

And here’s the completed job:

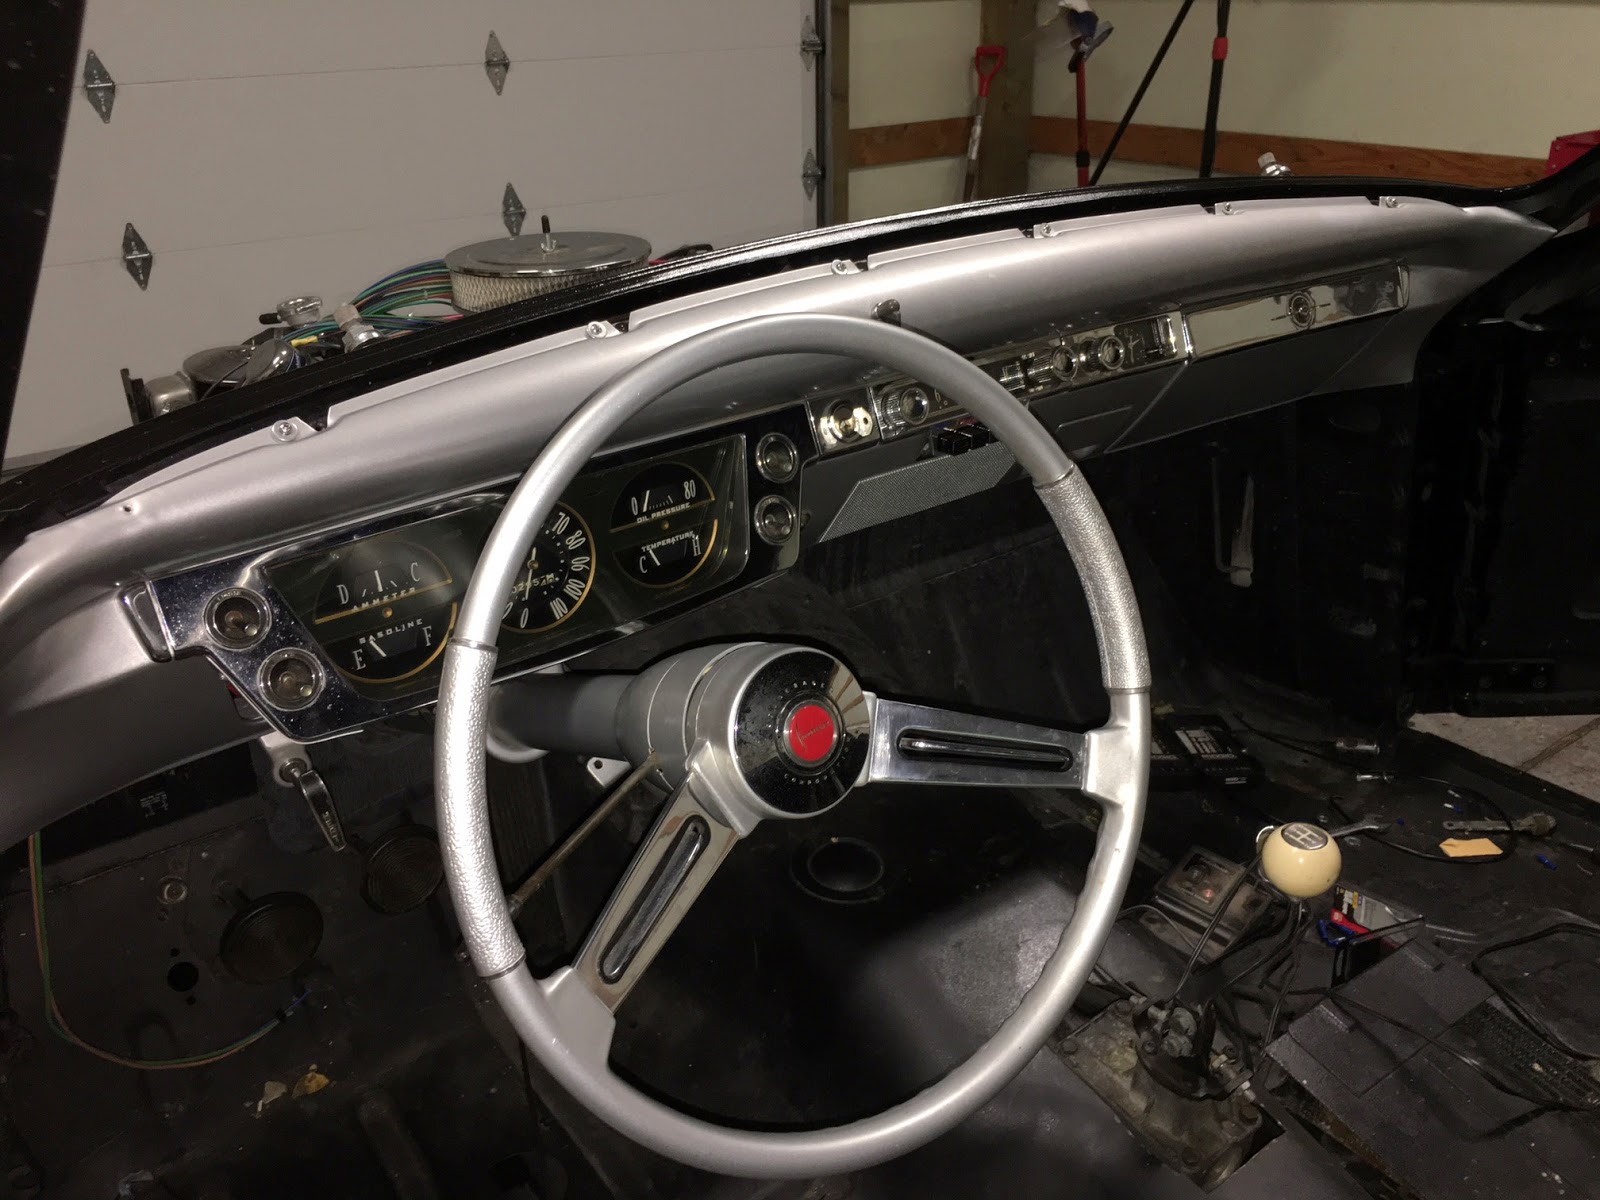
Wait, where did those red seats come from?


Monday, September 5, 2022

Updates

 It has been awhile.

I’ve continued to work on the Stude off and on over the last couple of years. It has mostly been a matter of putting things back together, and troubleshooting when there’s a problem (for example, my headlights wouldn’t work, so I busted out my trusty voltmeter and went through the system to identify the fault. It ended up being a faulty dash switch.) But mostly it has been waiting for the upholstery shop. 

Which apparently closed. I’d been in contact with the owner, who kept saying, “yeah, the seats are stripped down and we’re ready to start on them,” but then wouldn’t give me a date to bring the car up, and then stopped answering the phone. 

So I made a decision—I’m going to do as much of this as I can myself. To that end, a visit to Studebaker John landed me with a set of front and rear seats out of a 57/58 Silver Hawk. I’ve decided to go back to a bench seat front because it just looks right. But for that to work for me, I’ll need to modify them. First. I’ll need to notch the lower front of the seat so I can shift gears, and, second, I’ll need to modify the seat backs to accept headrests (since I’m adding shoulder harnesses, the headrests are needed for safety.) I’ll still take the seats in to be recovered (along with the door cards) but I plan on doing everything else: headliner, carpets, wind lace…so stay tuned.

Test fitting. That vinyl is a bit stiff. (Careful observers will note the ceiling has been insulated.)

Monday, November 2, 2020

Paint and assembly

 Been a long time since I posted, but I’ve been a bit busy painting, wet sanding, painting some more, wet sanding again and then buffing, polishing, touching up a few mistakes, painting panels again when I couldn’t touch them up....

Anyway, I’ve finally gotten it to a point where I feel that I can share a more completed project. For the remaining fiddly bits, I’ll do detailed posts. But for now, just a few pictures.


When I first started painting in the Barn, dust wasn’t a problem. But after a year or so, I ended up setting up a home made “paint booth” to help control dust and the occasional bug.

Buffing. Lots and lots of buffing

Did i mention buffing? And just a little bit of polishing (honestly, the whole car will need gone over by someone a bit better than me--but I'm happy enough with it for now.)


Assembly is the reverse of disassembly...well, not quite. Another new radiator (I wasn't happy with the old one--this is a much better fit. From a Datsun 240Z --with enough cooling for a V8.)

Wonder where they got the grill idea for the old batmobile, eh?


A little dusty, but looking like a real car again.

Saturday, June 15, 2019

Rear Quarter Windows Assembly

After sanding down and painting the window surround (they were in exceptionally good shape) it was time to install the new seals and reassemble the "flip out" rear quarter windows.
Frame and new seal


First, before doing anything, I thoroughly cleaned the seal to remove any strange coatings left over from the manufacturing process. Then, after spraying the lip of the seal with water with a few drops of dish-washing detergent to use as a lubricant, I aligned the slots for the hinges, and started pushing the top, inside edge of the seal into the slot on the frame.


Next, it is a matter of going around the frame and carefully working in that top, inside edge all the way along one side and into the corners...


Then flipping it over and pushing in with your thumbs along the other edge.


Finally, everything is in place:


The hard part comes next--coaxing the hinges through the small slot in the seal. I lubricated the slot and the hinge with a bit of WD-40. Lots of wriggling and swearing, but the finally got them through.


This part takes the most time. Those new seals are really stubborn.

Once through, align one of the outer holes, clamp with vice grips, and run a rivet through it. Although the originals were blind rivets, nobody will ever see that I used pop rivets (steel so no issues with dissimilar metals.)


And the hinge side complete:


Next, you have to rivet the latch to the frame. Again I used steel rivets, but forgot to take a picture (I'm out of practice!)


A few stainless steel screws, and job done.


Sunday, July 8, 2018

Wiring the dash

I'm saving up the rest of the painting photos until I finish the "cut and buff" stage, but there's been other work going on. Remember that my goal is to get everything from the firewall back ready so it can go to the upholstery shop, so, for the past couple of weekends I've been completing the dash and all the wiring to the rear of the car.

First up, the instrument cluster.

That's the old wiring on the top

I'm putting modern wiring in the car. So basically it is a process of translating the wiring diagram for the new kit, which is 12-volt negative ground, the old wiring diagram from the car, which was 6-volt positive ground, and then figuring out any additional accessories or upgrades I may have added. The process, once I identify which wire goes where, is to slide on a piece of heat shrink tubing, put the appropriate connector in place, crimp it, then shrink the heat shrink. It is a bit tedious, and required all of my concentration at times. So I didn't end up taking many pics--there's plenty of instructions out there if you're curious.

Next, I made a small bracket to mount the fuse panel to the inside of the firewall. Nothing special, just some measuring and bending a small piece of sheet metal. Here it is all in place.

 
I added a few modern convenience features--like plugs so if I ever had to take the instrument cluster out for service I wouldn't have to disconnect each gauge individually:


Then it was simply a matter of tucking everything in place. I used lots of zip ties to keep things neat and orderly. I'm really pleased with the end result:


Sunday, October 8, 2017

Painting the body shell

Finally started painting.

Technically, I'm supposed to paint it with the rear fenders attached, but I found some black seam sealer that is a perfect match--and given that I don't have a paint booth, it just seemed easier to do it this way (words I've frequently regretted--but we'll see.)

After a good cleansing it was time for masking.

Always easier than it looks -- it was a lot of work!
 I'm painting a single-stage enamel boat paint. I chose this largely because I can do it without an air-feed respirator which most of the modern automotive paints require. And being a boat paint, it has UV inhibitors in it, giving it a plus over my other options. And from what I've read, it should be a pretty close match to what the car was painted with originally.

Here's my first coat--a light "tack" coat to give the other layer something to stick to...


And here it is after the second coat. Not too bad, considering it has been about 20 years since I painted a car. 


There's a bit more "orange peel" than I liked, as you can see in this close up:

Not bad, but if I put another coat over this, it'll look worse
 So a quick wet sanding of the body shell with 1500 grit, and I was ready for the final coat:


Overall, it laid flat and looks nice. I have a couple small runs that I need to sand out--but that's the beauty of single stage--you can sand out mistakes, then polish it up like they never happened. It's hard to take a picture of black cars--you're seeing more of the reflections of the roof and my lights than of the paint.

On to the rear fenders and doors.

Saturday, August 26, 2017

Stripped

Today I took off the doors, rear fenders and the trunk (and associated hardware.) Yes, I've been here before.

The cardboard? Still have a tiny leak somewhere in the power steering system.
So what's the plan? This is a little non-traditional, but I'm going to get everything painted and together from the firewall back, send the car to the upholstery shop, and while they're working on that (which will likely take a few months,) finish up the front sheet metal.

Really loving the new shop. I'm still working via extension cords, but it is nice to have all the room I need.

Sunday, August 20, 2017

Doghouse removal

While I'm sure there's an odd low spot here or there that I missed, it is close enough that I need to tear it back down to paint the door jambs and other spots that don't show. First step, is to remove the front fenders and hood--also known as the doghouse.

This hood is pretty big, so I had to get creative removing it by myself.

That's as good as an extra pair of hands

Amazingly enough, it doesn't scrape the ground
Next, off comes the front cowling and the driver's side fender.


And it's time for lunch. You didn't expect me to work through lunch to remove the right fender, did you? It's a hobby after all.

Ed. Just so you wouldn't think I was overly lazy...

I really need to send this thing out for alignment...

Sunday, August 28, 2016

Inspiration

Stopped by the car show co-hosted by our local chapter of the Studebaker Drivers Club this morning for a little inspiration...

My favorite of the day, and a model of Studebaker I'd like to own someday, was this nice '50 Land Cruiser:


Up next is a very nice '63 Avanti, sporting a factory supercharger and 4-spd. Wish the hood was open!

A very nice '63 Daytona hardtop:


And finally, a 53 pickup survivor. That's not grey primer--that's original paint! A little faded and worn through in spots, but still there after 63 years--just amazing. I'd love to have a late 40s, early 50s Stude pickup just like this.