Monday, September 2, 2013

Quick status update

Had a fairly productive weekend.

First, I got the freshly rebuilt control arms/kingpins/spindles installed along with the new progressive springs. I had a bit of a struggle with this, until I read on the Studebaker Driver's Club forum where some people unbolt the bottom of the kingpin instead of trying to align the four bolts on the inside of the lower control arm. This helped considerably, and assembly was quick and straightforward.

Note the safety chain--car springs can kill people!


Next, I started to install the new front sway bar assembly--if you recall, I ordered a high performance/heavy duty front and rear set. Installation of this on my car is difficult at best--and requires quite a bit of force. Without the engine in, I discovered that I was lifting the car off of the front jack stands trying to get it in place. So I've decided to wait to put that on when the engine is in and the front end is back on the ground.

You'll also notice that a disk brake rotor/hub is still on the ground--modifications tend to take time. I had forgotten that the front disk assembly requires a specially machined piece to heated and then pressed fit on the spindle. Unfortunately, those special pieces are on the old suspension! I'll have to order a replacement pair (I don't think it is worth the effort to try to remove those--they should be inexpensive to replace but, I imagine, nearly impossible to remove from the old spindles.)

And my brand new shocks for the front don't fit my new lower a-arms. 

So my modifications are slowing me up a little. That's the nature of things.

I did go ahead and put a new shaft and new bearings in the bellcrank--the center around which the steering components spin--sorry no pics, but it really was simple to do. I then installed the tie rods (complete with new ends), and cleaned up the steering box.

That's what the inside of an old-school steering box looks like!
And that's where things are for now.


Saturday, August 24, 2013

Undressing

Time to get to work.

I've decided to tackle the suspension and steering first. This creates a minor problem, as the springs are designed to be taken out with the weight of the engine on the car--as light as the car is now, the springs would just throw the car up in the air if the suspension were unbolted. But there's a sneaky way of getting around this; you'll see in a minute.

First, off comes the disc brake caliper, which is then bungee tied to the frame so it doesn't stress the brake hose:


Next, the tie-rod end is removed from the steering arm--one of the few times working on a car when you actually get to use a big hammer:


Next, I pulled the brake disc and hub assembly. If I weren't replacing the a-arms with the ones I rebuilt previously, I could just leave them on--but since that's not the case, off they come:


After removing the adapter bracket for the brake caliper, I removed the sway bar from the lower a-arm by unbolting two bolts and removing the retaining clips:


Then I removed the shock absorber:


Now for the alternative spring removal method: a 1/2-inch piece of all-thread, double-nutted on each end, with a fifth nut to tighten and then loosen the tension on the spring:


Then it was simply a matter of removing the four bolts holding on the lower a-arm, carefully releasing the tension on the spring by loosening the fifth nut on the all-thread slowly. Once the pressure was off, it was simply a matter of removing the top two bolts.

Next up, I removed the steering components--a few more bolts, and some careful tapping with the hammer and pickle fork...

My parts stack is growing
Then it was simply a matter of "lather, rinse, repeat" on the other side...


After removing the steering center bearing (it was very greasy, so I didn't take any pictures of the process--it was simple: remove the four bolts holding it on, remove the grease zert in the side, then slide it out the bottom of the front cross member) I was left with a naked front frame section, ready to clean up and paint.


Friday, August 23, 2013

Home again


The firewall has been painted and she's back in my garage. It's looking good!

Expect a bit more activity on this blog in the very near future.

Sunday, August 18, 2013

Power Ram!

This afternoon I tackled the last part of the power steering system to reseal--the power cylinder (commonly called the power ram, or ram.) The power cylinder is a typical hydraulic cylinder: pressurized fluid from the pump flows through the control valve, which decides to either push the rod out of the cylinder by adding fluid to one side, or pull the rod back in by adding fluid to the other side. This, when attached to the steering components, reduces the amount of force required by the driver to steer the car.

This job is fairly straight forward--first I started off with a cleaned up and freshly painted power cylinder:


Then I removed the tie rod end...


 Looking at the diagram it looks simple enough...
 

First, I need to remove the snap ring. Unfortunately, my snap ring pliers were too big for the hole, so I used that small file to re-size the ends of the pliers to fit. Then out it came.


Normally, if the unit was being repaired while on the car, the mechanic would start the car and turn the steering wheel--this would apply pressure and force the seals out. I tried to use my air compressor to force them out, but this didn't work. Patience and small screwdrivers were called into play.


Assembly involved lightly lubricating the new pieces in power steering fluid, then carefully fitting them in place. A little touch up paint was needed and then job done!


Thursday, August 15, 2013

Oh the guilt...

I installed the new alternator on the engine today:

50 amps (vs. the original 35!)
Why the guilt? The alternator is from a 1979 Honda Civic CVCC, and was only $30. Somehow, that seems like cheating...

Thursday, August 1, 2013

Motion

The Stude has been moved from the bodywork/tech area to the paint area.

Saturday, July 20, 2013

The British Invasion


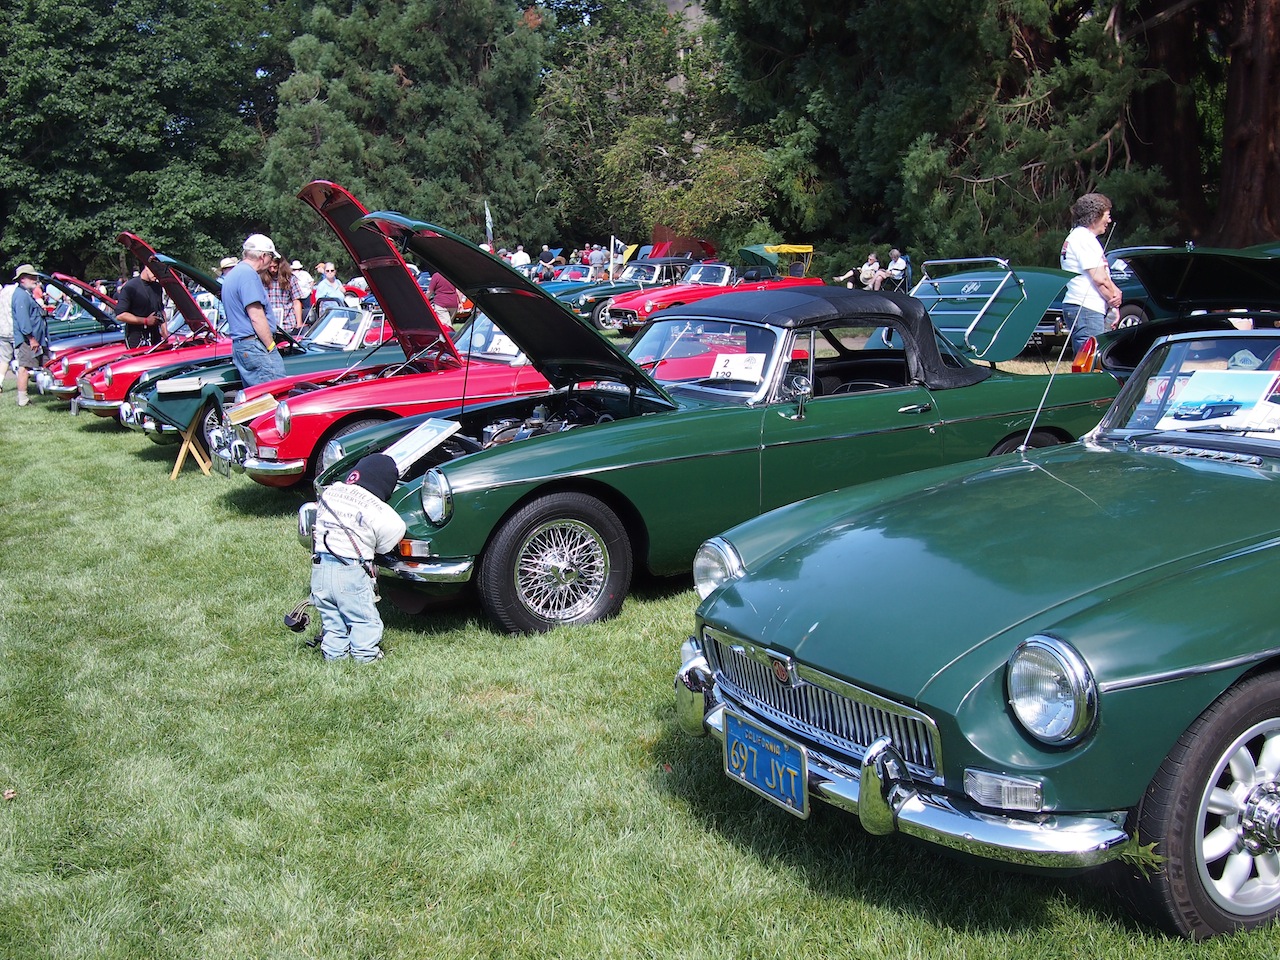
I live in a small university town in Oregon, so it isn't often that we're treated to hosting an international meet of car collectors. Today, the MG Experience--as part of their annual meet--held a car show to show off their cars. Over 300 of them filled the memorial union quad at the university.

And what beautiful cars they were--I have a soft spot in my heart for MGs since my first sports car was a 1974 MGB.

But I do have to say, my favorite of all the MGs is the MGA. While this meet was namely for MGB owners, quite a few MGAs showed up, making me a happy car show stroller.

Enjoy the pics. It was a gorgeous day.


Friday, June 28, 2013

Blocking has begun


I visited the body shop to discover that blocking has started on my car. The picture above is of the driver's door. A guide coat has been applied and sanded with a long sanding block. The dark areas in the picture are low areas. They will fill/sand until all low areas are gone.

Nice to see some progress at the body shop.

Monday, June 24, 2013

Control valve reseal

Next up in the Power Steering resealing project is the control valve. The control valve hangs below the steering box on the pitman arm, with the reach rod to the bell crank extending out of the front (in the pictures below this part had already been removed). The motion of the pitman arm pushes the reach rod forward or backward to turn the front wheels; the control valve captures this movement through a sliding ball stud which moves a slotted piston (called a valve spool) back and forth. As it slides past openings within the housing, it allows power steering pressure to activate a piston in the power cylinder mounted between the frame and the bellcrank. This provides power assistance to the steering.

Don't worry, there won't be a test.

Now back to the reseal. This is the easiest one as the kit only contains two o-rings. It can even be done with the control valve mounted on the car.

First, into the tray for cleaning!

It wasn't terribly dirty since I'd already lightly cleaned it previously.
And now disassembly. First, the two screws holding the cap are removed.


Next up, that nut holding the spring under pressure comes off, and the piston assembly slides out.


Confession time--in the picture above, since the unit was off the car, I removed the two bolts holding the housing and the ball stud sleeve (on the far right) to make it easier to reach the second o-ring. Plus it allowed me to thoroughly clean the housing.

Assembly was, of course, the reverse of the above process, after coating the moving parts liberally in power steering fluid.


On the far right is a plastic cap, only fitted on the 64 models, to help keep debris out of the grease in the ball stud sleeve. This appeared to be slightly distorted (grease was leaking around it) so I removed it and will have to see if I can get a replacement soon.

I've refrained from painting it--I'm going to save that until I reseal the power cylinder since it will need paint as well.

Sunday, June 23, 2013

Power Steering Pump Reseal

Thanks to Jerry at Studebaker Center of Oregon, the parts arrived to seal up my power steering system. I figured I'd start with the one with the greatest number of seals.


First, I remove the pulley and shaft key...


Then undo the bolt to remove the reservoir.


Next up, the brackets.


And then the relief valve/flow control unit.


After this, the pictures low down a bit because my hands were getting a bit gunky and I didn't want to get power steering fluid all over my phone. But occasionally, I wiped things clean and snapped a picture. Here the case is apart, the rotor shaft, pump cam insert, pump carrier and rollers are removed for inspection.


Then it was a matter of cleaning up all the internal passages and pieces with a "suitable" solvent.  One of my favorite is brake cleaner--it evaporates rapidly and works well--so a few squirts and I'm ready to reassemble. Basically, it is just going through the same steps backwards, but you have to replace all those seals. Everything is also coated liberally in power steering fluid (Dexron III Automatic Transmission Fluid is a good modern substitute for the fluid Studebaker used back in the day.)

And we're back together:


It was actually pretty simple. I'm sure it wasn't working as efficiently as it could have been as some of the original o-rings had basically dissolved--little left but a bit of material. Of course, it'll be a while before I can see if it is sealed and working properly; that's always a bit of a scare when working on a project of this magnitude. When doing auto repair you typically replace a faulty part and then get to immediately test your repair and correct any issues. In a project like this one, there's a long wait and many systems that will need adjustment (or fail and need repair) before you can get back on the road. Here's hoping those adjustments are minimal.